Most seasoning guides treat visible smoke as proof you are doing it right. That is backwards. Heavy, continuous smoke is where seasoning starts to fail, not where it succeeds.
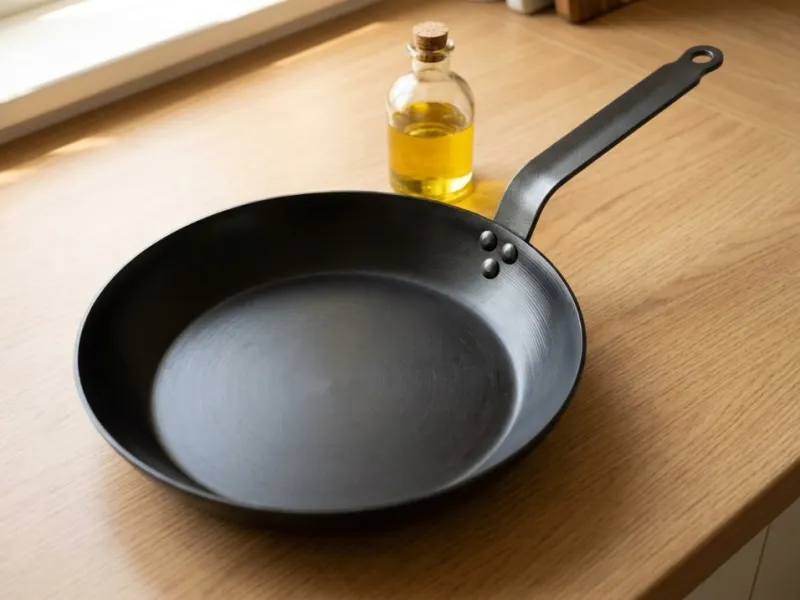
A carbon steel pan needs a thin layer of polymerized oil baked onto the bare metal. A flat fry pan builds that layer entirely on the stovetop, no oven required.
Heat the oil past its smoke point, wipe until the pan looks dry, and stop at the first wisp of smoke rather than chasing more of it. de Buyer's own instructions get there in one pass. Mauviel's own instructions call for two.
That last part is where almost every first attempt goes wrong, and it is not the part most guides warn you about.
We compared de Buyer's own seasoning instructions, Mauviel's product specs, and the existing stovetop-seasoning guides already covering this keyword to see what they leave out.
Why the Stovetop Works for a Flat Pan#
Oven seasoning earns its reputation on cookware a single burner cannot heat evenly, a thick cast iron skillet, or anything wider than the burner underneath it. The oven's ambient heat wraps the whole piece at once. One burner cannot do that for an oversized surface.
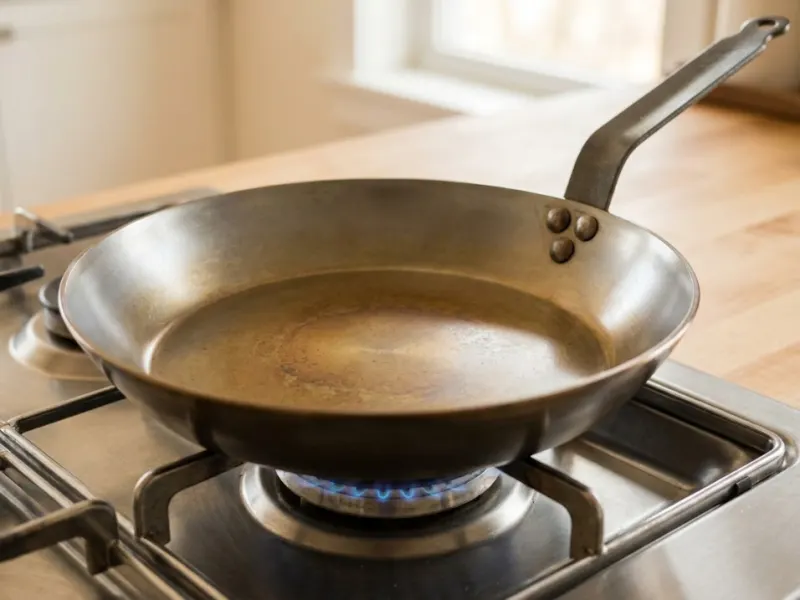
A flat carbon steel fry pan does not have that problem. Match the pan's base to a burner close to its own diameter and the burner heats the cooking surface directly, the same surface that needs the seasoning.
de Buyer's own instructions for its Mineral B Classic line confirm the split explicitly: that pan "should be seasoned on the stovetop only," while lines with higher oven tolerance get different guidance. Mismatch the pan and burner sizes, though, and you invite the problem stovetop seasoning gets blamed for. An empty pan sitting over a heat source smaller than its base heats the center faster than the edges. That uneven expansion is how warping starts, the same thermal-expansion physics that applies to any thin metal pan on a mismatched heat source.
The Smoke Myth That Wrecks Most First Attempts#
Here is where nearly every first attempt goes wrong. Reaching the oil's smoke point is what triggers polymerization, the reaction that bonds oil into seasoning. A brief wisp of smoke means you have arrived.
Visible smoke is a signal, not a target to keep chasing. Grapeseed oil is heavy in polyunsaturated fat, which is exactly why it cross-links into a flexible seasoning layer once it clears that point.
A lot of first-time seasoners read "heat until smoking" as an instruction to hold the pan in heavy smoke. Some crank the burner higher, on the theory that a darker, smokier round means better seasoning. It does the opposite.
Hold the pan in heavy, continuous smoke well beyond that first wisp, or crank the heat chasing a darker color, and you carbonize the oil instead of letting it finish bonding. The result looks impressively dark on day one. It flakes off later, because carbonized oil never actually polymerized onto the metal. It just sat there and burned.
The fix is restraint, not more heat. That first hint of smoke is the stopping point. Pull the pan, let it cool, move to the next round.
Strip the Coating First#
New carbon steel pans ship with a thin beeswax coating meant to prevent rust in transit. The Mauviel M'STEEL carries one, and so does de Buyer's Mineral B line. That coating has to come off before oil can bond to bare metal. Trying to season over it just seasons the wax instead.
Scrub the entire pan, inside and out, with hot water, dish soap, and a stiff sponge. Owner reviews on a comparable de Buyer beeswax-coated pan report that plain hot soapy water is not always enough, and that the same owners find hot water plus Bar Keeper's Friend and a salt scrub gets the wax off with less effort.
The surface should feel slightly rough when dry, not slick. Dry it completely on a burner over low heat for about a minute before any oil goes near it.
How Many Rounds It Actually Takes to Season a Carbon Steel Pan#

Set the clean, dry pan on a burner sized close to its own diameter. Heat on medium until the metal is evenly warm. A splash of water should sizzle immediately, not sit and boil.
Add a small amount of grapeseed oil, enough to cover the bottom of the pan; de Buyer's own instructions call for a small amount, Mauviel's call for covering the bottom. Spread it across the entire cooking surface with a folded paper towel, then wipe until completely dry. Any visible sheen means too much oil is still there.
Turn the heat to medium-high and watch the color shift from silver toward gold as the metal approaches temperature. Once it has shifted and the surface starts giving off smoke, pull it off the heat and let it cool for a few minutes.
de Buyer's own instructions for the Mineral B Classic say that single pass is enough on its own: "you could stop here and start cooking." Mauviel's own instructions go one round further. They call for heating the oil about 5 minutes each time, and treat the pan as ready for use after a second round.
We recommend one round beyond either brand's own minimum before searing something delicate on the pan. Each additional pass bonds another microscopic polymer layer onto the surface, the same cross-linking chemistry covered above. That extra round is a margin-of-safety choice, not a requirement either brand makes.
Whatever number of rounds you land on, expect a bronze to light brown tint across the surface afterward. That is a functional baseline, not the finished product. Real non-stick performance builds over the following weeks of regular cooking with a little extra oil in the pan.
What to Cook First#

For the first several meals, lean into fat rather than away from it. Bacon works well, and so does a fried egg with more oil than seems necessary, or sautéed vegetables in a generous splash of oil.
Every one of those sessions adds another microscopic polymer layer on top of the stovetop rounds already done. Skip straight to a dry sear on a barely-seasoned pan and food sticks, which has nothing to do with technique and everything to do with timing.
Avoid acidic ingredients such as tomatoes, wine-based sauces, and citrus until the seasoning looks established, which takes shape over the first months of regular use rather than on a fixed schedule. The cured polymer itself is chemically inert once it has fully cross-linked, so acid does not dissolve a finished seasoning layer the way it would a raw fat.
The real risk with young seasoning is coverage, not chemistry. A few layers in, there are still likely to be microscopic gaps where bare metal shows through, and acid attacks the iron right at those gaps. Full, continuous coverage after enough layers leaves acid with no bare metal to reach.
If food starts sticking in patches after a few weeks, that is almost always too much oil applied at some point, not damage. Scrub the sticky patch off and reapply a thinner layer next time. A patchier pan, weeks in, sometimes seasons faster from a full reset than from fixing it layer by layer. The more stubborn version of that problem, seasoning that keeps flaking off entirely, gets its own breakdown in carbon steel pan seasoning coming off.
Picking a Pan That Makes This Easier#
The stovetop method works on any raw carbon steel pan in the common 10 to 12 inch range, and technique matters more than brand. Owners of a de Buyer Mineral B, covered alongside the trade-offs in is a carbon steel pan worth it, can use this exact process with no changes.
The Mauviel M'STEEL is the pick featured above, and its 2 to 2.5mm steel construction gives more margin for error reading color before the pan overheats than a thinner budget pan would. It is not without trade-offs. The card above covers the handle and heat-ceiling caveats, including Consumer Reports's lab testing.
We would point budget-conscious cooks toward a de Buyer instead if that wider margin for error is not worth the premium, since it seasons exactly the same way.
Carbon steel also works on every cooktop type, including induction, unlike Mauviel's copper lines. The induction compatibility checker confirms in a few seconds whether a given stove qualifies.
Still deciding whether carbon steel is worth the seasoning commitment at all, versus cast iron or non-stick? Is a carbon steel pan worth it lays out the actual trade-offs. Working with a wok rather than a flat pan? The process changes for the curved walls, covered separately in how to season a new wok.
Our take: seasoning a carbon steel pan is a restraint problem more than a technique problem. Keep the oil thin, respect the smoke as a signal rather than a goal, and a flat pan on a matched burner gets you a working non-stick surface without ever touching the oven.